

Let’s be brutally honest: building a highly accurate Machine Learning model is only 20% of the battle. The real nightmare? Getting that brilliant model out of your cozy Jupyter Notebook and into production where real users can actually interact with it.
If you’re still wrestling with heavy, sluggish frameworks or spending days configuring complex web servers to serve a simple prediction, it’s time for a reality check. At Zechrome Technologies, we obsess over speed, scalability, and developer experience. That’s why we made the switch to FastAPI for deploying ML models and you should too.
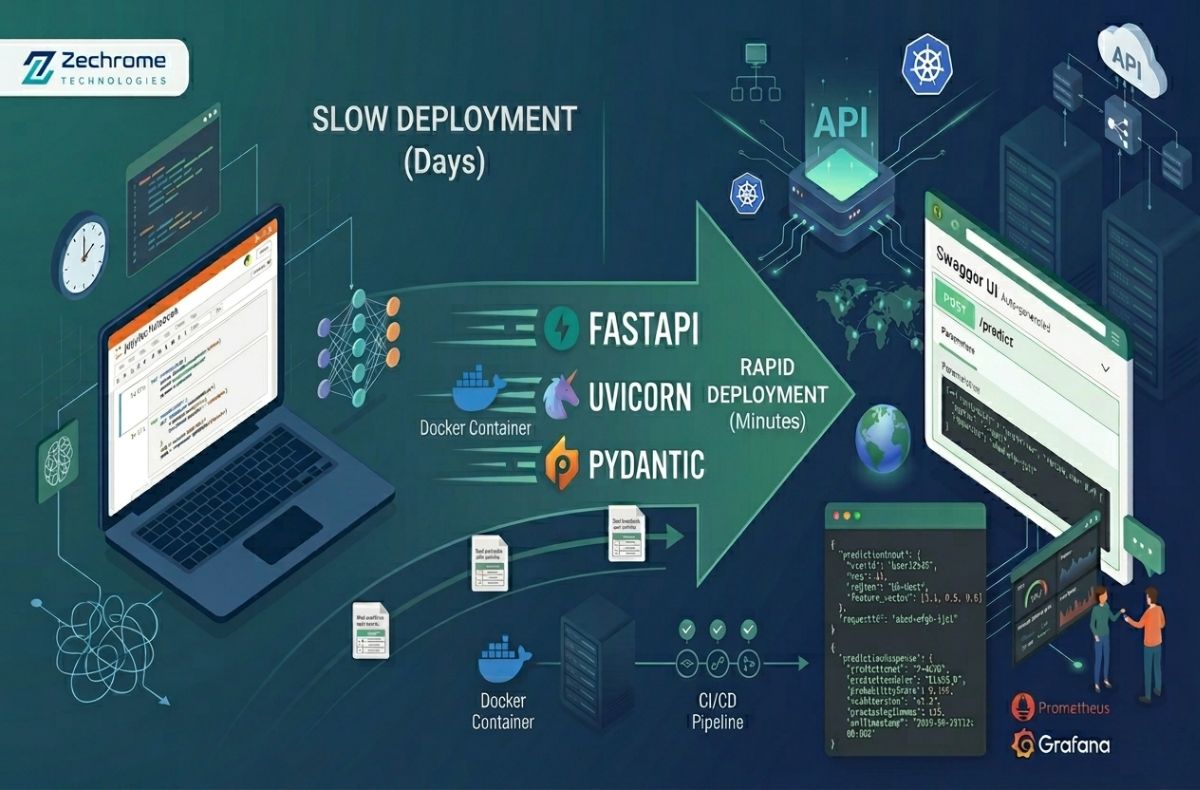
Here is exactly how you can deploy your Machine Learning models in minutes, not days.
Why FastAPI is the Ultimate Secret Weapon for ML
FastAPI isn’t just another Python framework; it’s a massive upgrade to your deployment pipeline. Here is why the engineering team at Zechrome Technologies swears by it:
- Blazing Fast Performance: True to its name, it’s one of the fastest Python frameworks available, rivaling Node.js and Go. When your ML model takes time to infer, you don’t want your API adding unnecessary latency.
- Automatic Interactive Documentation: Write your code, and FastAPI automatically generates Swagger UI and ReDoc documentation. No more manually writing API docs for your frontend team!
- Built-in Data Validation: Thanks to Pydantic, FastAPI automatically validates incoming JSON payloads. If a user sends a string instead of an integer for an ML feature, FastAPI rejects it instantly with a helpful error.
- Asynchronous by Default: Native async support means your API can handle thousands of concurrent requests smoothly.

The 3-Step Deployment Blueprint
Let’s get our hands dirty. We are going to deploy a simple pre-trained model.
Step 1: Prep Your Environment
First, ensure you have the essential libraries installed. Open your terminal and run:
Bash:
pip install fastapi uvicorn scikit-learn joblib pydantic
Step 2: Save Your Masterpiece (The Model)
Assuming you’ve trained a model (let’s say a scikit-learn Random Forest), you need to serialize it.
Python:
import joblib
from sklearn.ensemble import RandomForestClassifier
# … your training code here …
# Save the model to a file
joblib.dump(model, ‘zechrome_model.pkl’)
Step 3: Write the FastAPI Magic
Create a file named main.py. This is where we bridge your model with the web.
Python:
from fastapi import FastAPI, HTTPException
from pydantic import BaseModel
import joblib
import numpy as np
# 1. Initialize the app
app = FastAPI(
title=”Zechrome Technologies ML API”,
description=”Blazing fast model deployment”,
version=”1.0″
)
# 2. Load the model (Loads only once when the server starts!)
try:
model = joblib.load(‘zechrome_model.pkl’)
except Exception as e:
model = None
# 3. Define the input data schema
class ModelInput(BaseModel):
feature_1: float
feature_2: float
feature_3: float
feature_4: float
# 4. Create the prediction endpoint
@app.post(“/predict”)
async def predict(data: ModelInput):
if not model:
raise HTTPException(status_code=500, detail=”Model not loaded”)
# Format input for the model
input_data = np.array([[
data.feature_1,
data.feature_2,
data.feature_3,
data.feature_4
]])
# Make the prediction
prediction = model.predict(input_data)
return {“prediction”: int(prediction[0])}
Step 4: Launch It to the World!
Run the Uvicorn server to bring your API to life:
Bash:
uvicorn main:app –reloadBoom. 💥 Your model is live on http://127.0.0.1:8000. Navigate to http://127.0.0.1:8000/docs to see the beautiful, auto-generated interactive UI where you can test your predictions directly in the browser!
The Zechrome Technologies Edge
Deploying an ML model doesn’t have to be a bottleneck that drains your team’s energy. By leveraging FastAPI, Zechrome Technologies ensures that our AI solutions are not just intelligent, but highly accessible, scalable, and robust in production environments.
Don’t let your models collect dust in a notebook. Wrap them in a high-performance API and let them do what they were built to do: solve real-world problems.